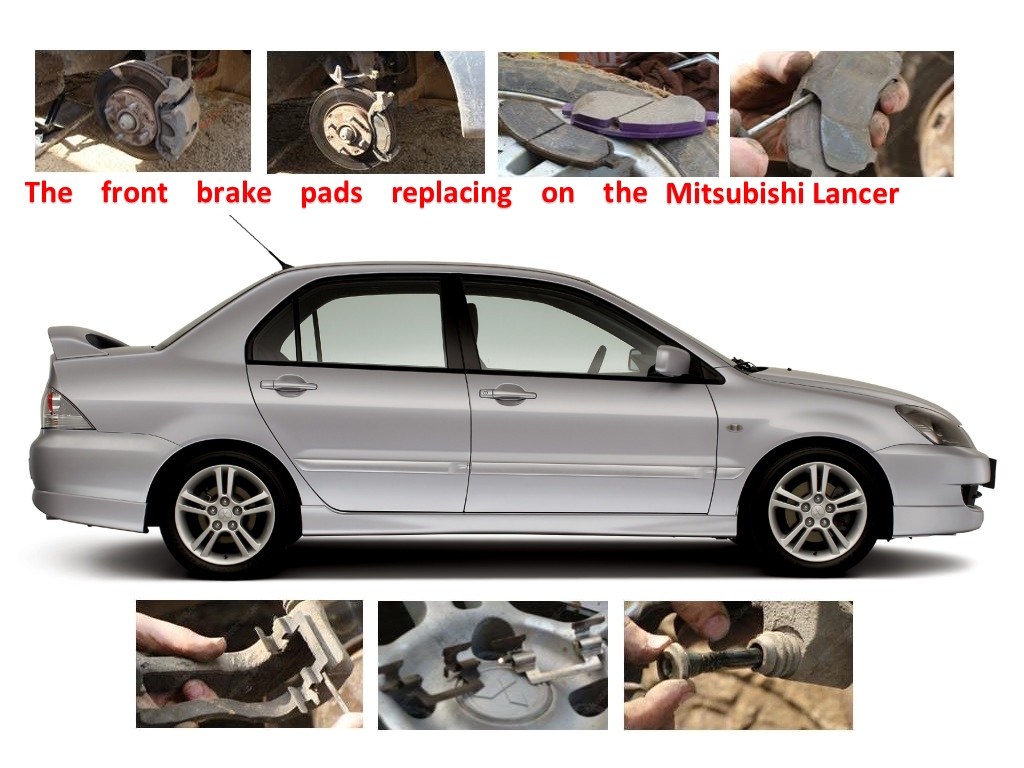
The front brake pads replacing
When was the last time you checked the condition the front brake pads? When did you replace the front brake pads? Is it difficult question? If you can`t answer this question, you have to remove the wheel and inspect the state of the pads yourself. If you heard characteristic squeak during braking and rattle sounds in the area of the front wheels, then you cannot bother with checking. The best variant will immediately go to the car shop to buy pads.

If you doubt once again to see how things are. Therefore, you should know you that the brake pads replaces in such cases: wear of pads lining up to a thickness of 2-3 mm, also if there are deep bullying, chips and cracks on the working surface of the pad, when peeling off the lining from the metal base of the pad.
In addition, you can see the description of the detailed replacement of the front brake pads on the car Mitsubishi Lancer 9 (Mitsubishi Lancer 9) with photos and tips on choosing parts and preparing the necessary tools.
Tools for brake pads replacing
The main tool you needs for self-replacing the front brake pads with the Mitsubishi Lancer 9 (Mitsubishi Lancer 9) is a jack, wheel wrench, large screwdriver or mounting blade, 14 or allen key, clamp or sliding pliers.
Spare parts
What are the brake pads to advice on the ninth Lancer? It`s a difficult question, since the range of pads presented on the car market is quite wide. In addition, all of them, for the most part, are of good quality. Of course, it is better to choose well known and time-tested brands parts. For example, someone thinks that Nisshindo’s better brake pads are not for Mitsubishi Lancer.
Someone raises and recommends pads from Brembo. I think these pads are a great choice. But, I chose Hi-Q (Korea on the front brake pads). They have main advantages – they do not squeak, do not crumble, the brake disk “does not eat”, the price does not “bite” and nurture about 40,000 km. What else is needed for complete happiness? However, this is my opinion and I do not impose it on anyone. The choice is always yours.
When you will replacing the pads, I advise you to keep on hand anti-corrosion insulating lubricant for brake systems – Bosch Superfit.
Description of the detailed replacement of the front brake pads on a Mitsubishi Lancer 9

Install wheel chocks under the rear wheels of the car. Then you need weaken the tightening of the wheel nuts by balloon wrench.
Then you need raises the car and so remove the wheel. Unscrew the fastening bolt of the lower guide pin and lift the caliper up. Remove old pads. At first clean the pad seats on the caliper guide, and then install new pads.
If the Anthers are torn and cracked, they need to replacement. Take out the caliper guide fingers. The next step is cleaning of fingers and install into place.

It`s need to check the mobility of the fingers in the guide caliper.
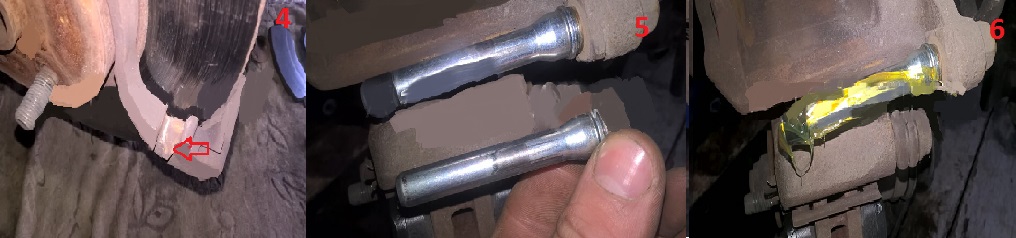
Further, it is necessary to press the piston of a support. Press the cylinder with your hands and, at the same time, check the strength of your fingers.
There is special device used for pressing in the caliper piston for this purpose. You can use sliding pliers.
However, it is better to use a special device for pressing in the caliper piston for this purpose (photo 7). In the absence of such a device, you can use a construction clamp or sliding pliers (approximately, as in photo 8). Dress caliper. Tighten the bolt guide pin.
Low down the car from the jack. In addition, tighten the wheel nuts finally.